 Printerdriver Network
16.11.2015
16.11.2015
|
<< Click to Display Table of Contents >> Navigation: Help for self-help > Installation Printerdriver >
|
Here the installation of a printer driver is shown exemplarily at a TSC TTP-245C.
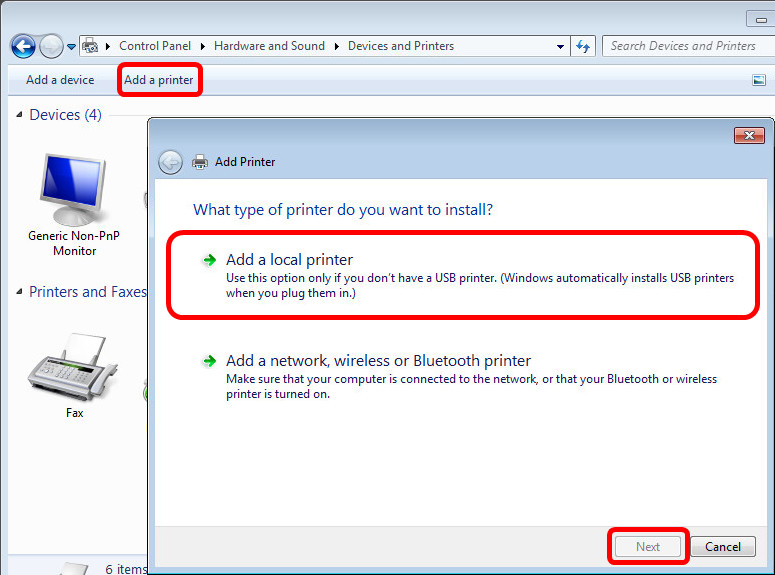
Open in the Control Panel the category "Devices and Printers".
Choose "Add a printer", click on "Add a local printer" and then on "Next".
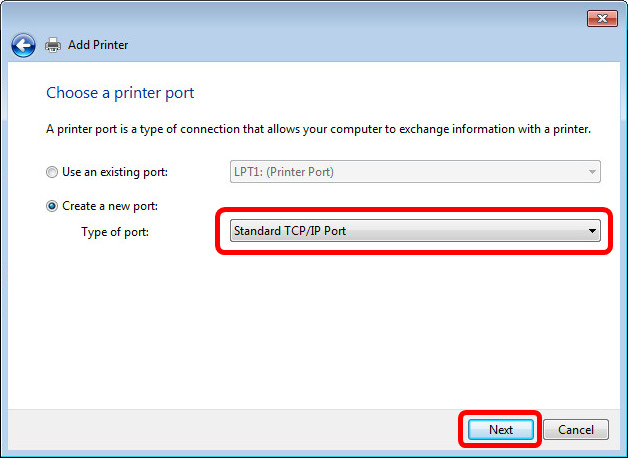
Choose "Create a new port" and here "Standard TCP/IP". Click "Next".
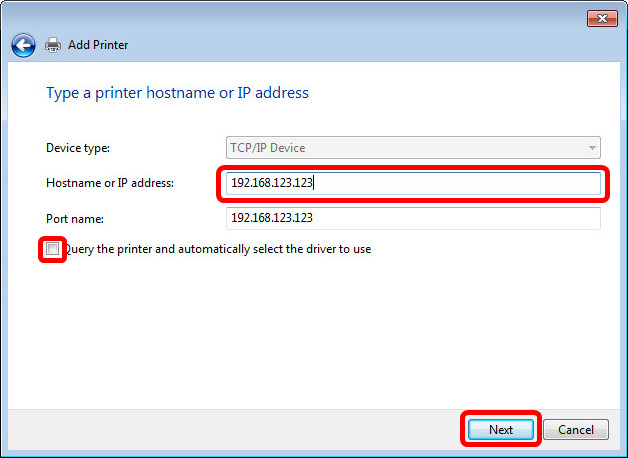
Enter the IP-Address of the printer in the designated field. Remove the mark in the checkbox "Query the printer..." and click "Next".
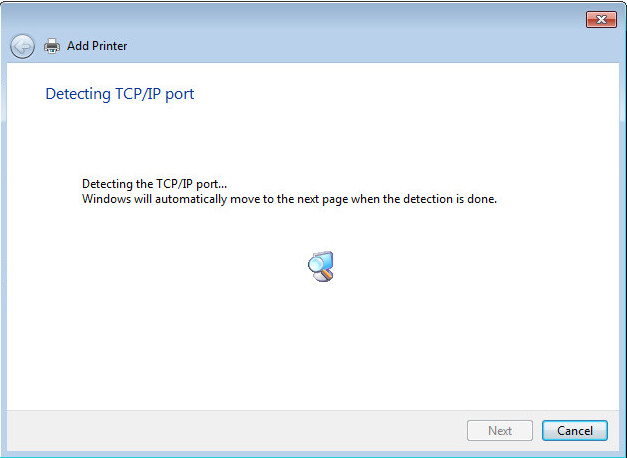
Wait until Windows is ready for the next step, you will probably see the following window for some time.
In the final Dialogue, select "Custom" and click on "Settings...".
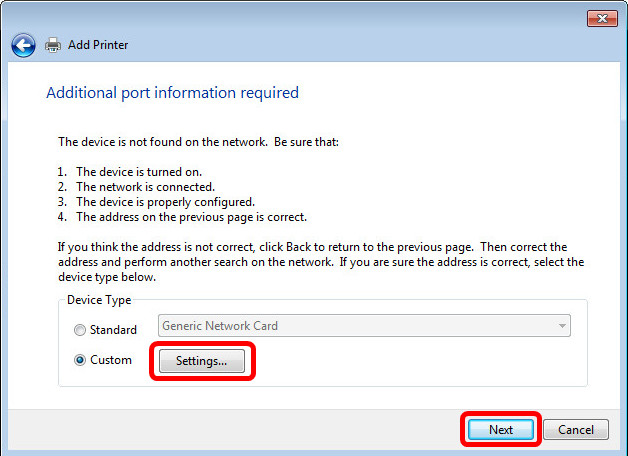
Check the port number, which is usually 9100. Only for Toshiba printers the value has to be changed to 8000, if the Toshiba printer is operated at standard settings. Finally click "OK". In the former window click now "Next".

The setup of the port is now finished. Now follows the printer driver installation. Choose as Manufacturer "Generic" and as Printers "Generic / Text Only". Click "Next".

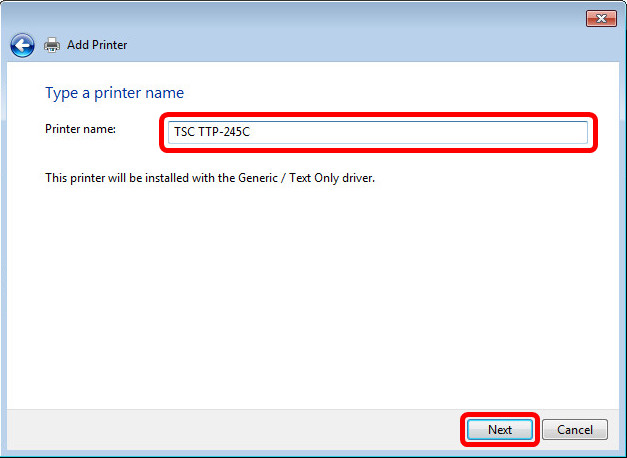
Give the printer an appropriate name and click "Next".
Click "Finish". The network printer is now completly installed.
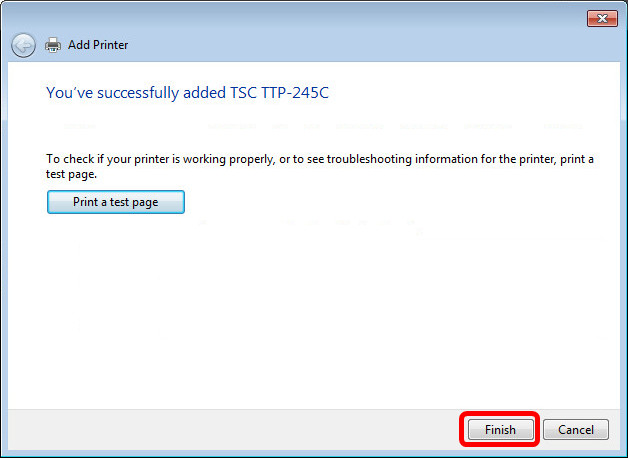
Please make sure that the installed printer is NOT the default printer!